Non-Destructive Testing Systems

Non-destructive testing (NDT or NDE) systems using ultrasonics, eddy current, flux leakage and x-ray technologies are supplied by InspecTech. Industries served include tube and pipe, automotive, welding and fabricating, plastics, steel and other primary metals.
Click drop down arrow for more details.
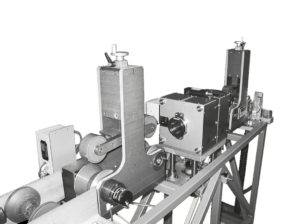
- Versions available for magnetic and non-magnetic materials.
- Suitable for high speed testing.
- Differential and absolute channels as standard.
- Full impedance plane analysis as standard.
- Defect marking system included as standard.
- Complete Data Logging of all Test Parameters easily stored, retrieved, hard-copied or downloaded.
- Instant recall of previously used setups.
Full body Eddy Current testing of tubular product is commonly an off-line (off the tube mill) process. It is very useful in cold draw operations to test the finished product before the ends are cropped. However, from time to time, the full body test is used as an on-line tool, mainly when small diameter (<25mm) tube is to be tested.
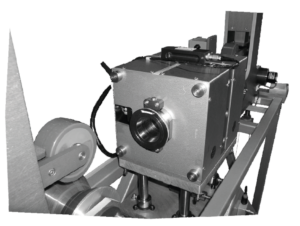
A full body eddy current test requires the tube to pass through an encircling coil. Size specific test coils are needed if several tube diameters are to be tested. If the test material is ferromagnetic a magnetic saturater is built into the test head with quick change pole pieces for the different product diameters.
The off-line (off the tube mill), version of the full body eddy current unit is normally supplied as a complete test stand including pinch rolls and drive mechanism. This complete unit can be supplied by InspecTech to the correct run height for insertion into a conveyor line. The on-line (on the tube mill), version uses just the test head mounted on the mill bed, with the mill providing the required steady throughput of the tube. In the on-line arrangements, rotators or sliders can be provided to move the test head out of the run line for easier set-up and calibration.
When ferromagnetic material is saturated for eddy current testing, strong residual magnetic fields can exist in the product after testing. Consult InspecTech for demagnetizing options.
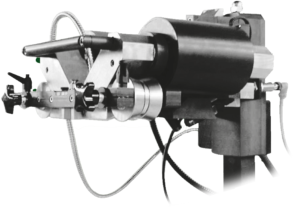
WELD LINE INSPECTION
The InspecTech® Eddy Current System is a utility on-line non-destructive testing system for weld-line inspection of thin wall tubing and can be used on high speed mills. Eddy Current is a cost effective method of testing welded tube. In the case of magnetic materials, there is also the requirement to saturate the weld. This means that the material to be tested must be magnetized to a high level, at which point it will behave under Eddy Current conditions in much the same way as any non-magnetic material. InspecTech’s Eddy Current Equipment is compact enough to fit on most mill beds, or can be floor mounted. Rotary stands are available to handle extremely large weld line skews.
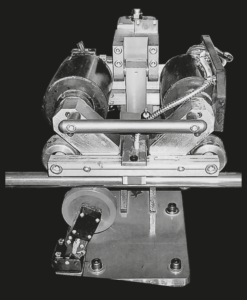
KEY FEATURES
- Full Impedance plane display included as standard.
- Differential and absolute detection modes included as standard.
- User friendly and low initial cost.
- Odometer and defect marking system included as standard.
- Probes cover a wide range of Weld-Line Wander.
- Complete Data Logging of all on-line Test Parameters easily stored, retrieved, hard-copied or downloaded.
- Instant recall of previously used setups.
The standard system consists of the mechanical test head which is mounted on the mill, and a stand alone electronic package. The test head is available in large and small sizes. The small unit tests from 0.500” (12mm) to 3.500” (90mm) OD, and the large unit tests up to 6.625” (170mm) OD.
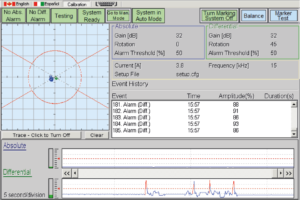
Operator's Screen with Absolute and Differential Channels
The Eddy Current application has a separate Data Logger software (supplied pre-loaded) that allows all relevant information from each session to be stored and downloaded for printing or storage at another location. The information stored by the Data Logger includes operator ID, calibration data, alarm settings, and information relating to total production and alarm locations (distances in meters or feet along the inspected product).
The InspecTech Eddy Current Test System is particularly suitable for the following:
- High-speed mill operations, small defects can be detected at high throughput
- Detecting spherical, circular and pinhole defects
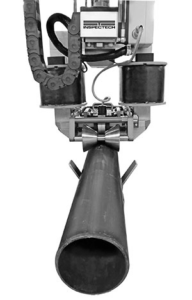
WELD TESTING OF ERW TUBE & PIPE
InspecTech® pioneered the use of the flux leakage method for on-line weld testing for tube producers, to be used directly on the tube mill. The Flux Leakage method of testing tubular goods has been used for many decades for full body inspection. InspecTech® has refined the Flux Leakage method, using advanced signal processing.
KEY FEATURES
- Inspect weld seam in carbon steel tubes, on-line, at high speeds.
- Suitable for diameters of 12mm and up.
- Capable of testing Galvanized and Aluminized product.
- Calibrates to 10% OD & ID notches and 0.8mm holes.
- Flux Leakage testing is economical and user-friendly.
- Superior Absolute & Differential operation compared to Eddy Current inspection systems.
- Complete Data Logging of all on-line Test Parameters easily stored, retrieved, hard-copied or downloaded.
- Instant recall of previously used setup.
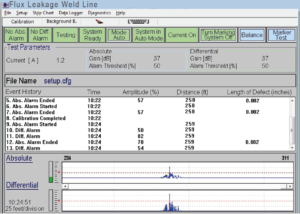
Operator's Screen with Absolute and Differential Channels
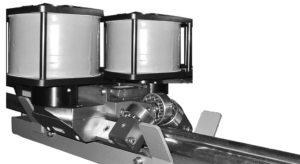
The complete Flux Leakage NDT test system includes two basic components: the robust mechanical subsystem that manipulates the on-line sensor, and the electronic package, which processes the signals from the sensor. InspecTech® offers three standardized Flux Leakage weld test units, based upon the size of product to be tested. Systems can be custom built for other size ranges or customer profiles. The smaller unit magnetizes the tube from below and is suitable for products in the general range of diameters from 0.5” (13mm) to about 3.5” (90mm). The larger systems are overhead, and magnetize from above and are used for diameters 2” (50mm) and up. The Extra-Large system is generally used for heavy wall material, where wall thickness can be as much as 0.625” (16mm).
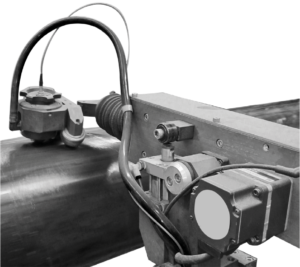
The InspecTech® I.B.I.S. (InspecTech B-Scan Inspection System) is an ultrasonic device that is especially useful to the welded tube industry. The I.B.I.S. scans the weld zone, and monitors the quality of the flash removal process.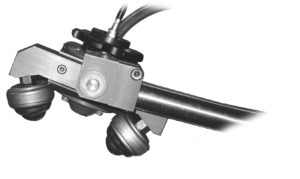
KEY FEATURES
- Scrap Reduction. Catch flash removal problems before they become costly.
- Real Time Presentation of wall thickness data in engineering units over the weld.
- Audio and visual alarms for high and low limits of wall thickness.
- “Hands Free” unattended operation
- Complete Data Logging of all on-line Test Parameters easily stored, retrieved, hard-copied or downloaded.
- Instant recall of previously used setups.
- Weight Calculation and Cutting to Weight (Optional).
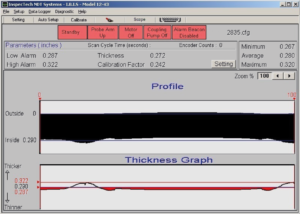
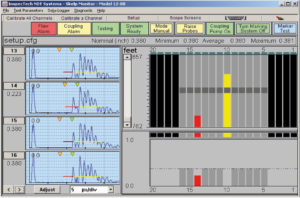
Typical operator screen showing the thickness and profile of the weld zone.
The I.B.I.S. is primarily a scrap reduction tool. It displays the weld profile in engineering units and in real time on a video display. Broken, worn or chipped flash cutting tools or mismatched weld edges are easily detected and alarmed. The I.B.I.S. will also monitor weld profile to make sure that the overall weld thickness is within tolerance.
Click to edit text. Focus on how you can benefit your customers.
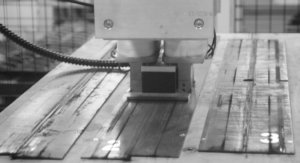
INSPECTION OF LASER WELDED BLANKS
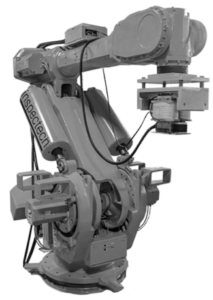
While Magnetic Flux Leakage (MFL) method is one of the oldest NDT methods, its utilization to test laser weld seams in carbon steel tailored blanks is relatively new. Simplicity of setup and high sensitivity make the method a superior alternative in an industry previously dominated by Ultrasonic EMATs and Eddy Current testers. The standard MFL package offered by InspecTech can test welded steel blanks up to 6mm thick. Testing is done by passing the material seam over the test head on a conveyor, or by passing the test head over the part by robotic manipulation.
KEY FEATURES
- Inspect laser welded seams in carbon steel plates, on line, at high speeds.
- Absolute and Differential channels differentiate between short and long defects.
- Ideal NDT for carbon steel plates up to 3 mm in thickness.
- Programmable set-up and changeover between products.
- Storage of all test results based on time, or piece by piece basis.
- Calibrates on 10% OD and ID notches and 0.5 mm holes.
- Economical and user friendly.
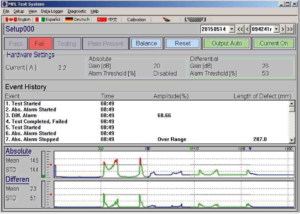
Operator's Screen with Absolute and Differential Channels
The typical location for the MFL system can be directly after the welder on the welding line, or at a downstream handling station for the welded product. There is also a special version of MFL system designed for use on a continuous welding line. It has a marking system to spray defects and a modified machine interface.
Click to edit text. Focus on how you can benefit your customers.
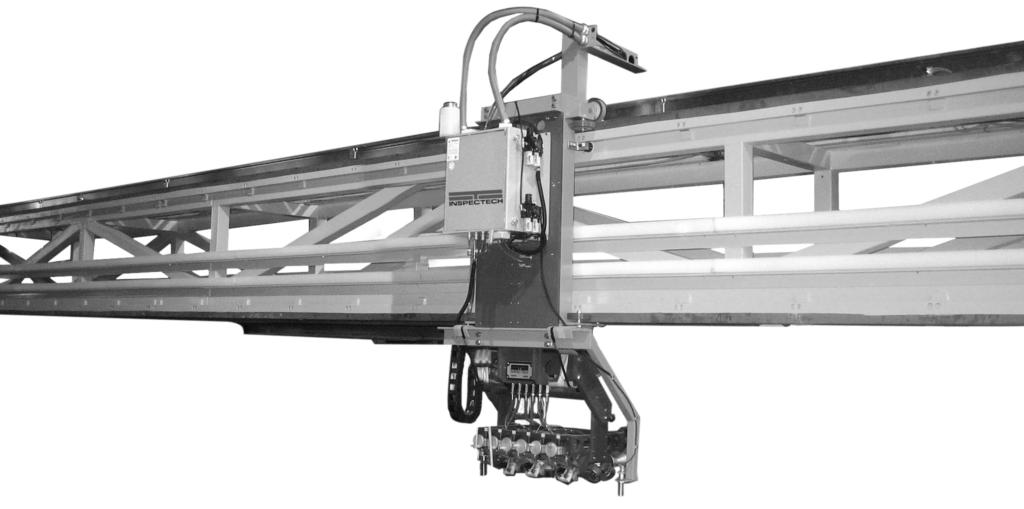
InspecTech® Off-Line Ultrasonic Test Systems are specially designed and configured to inspect the entire length of a weld seam in a tubular product. This form of testing is normally required for code compliances such as API and ISO. Testing is similar to InspecTech’s On-Line Test System, but the test head is configured differently and more mechanization is required.
KEY FEATURES
- Multi-probe test heads are easy to setup and calibrate.
- Ideal for inspecting to API-5L, API-5CT and ISO standards.
- Individually engineered units to meet specific NDT requirements.
- Flexible scope of supply with a wide variety of options.
- Complete Data Logging of all Test Parameters Easily stored, retrieved, hard-copied or downloaded.
- Discrete Array technology optional.
- Optional end-zone testing.
- Multiple test heads available to enhance productivity.
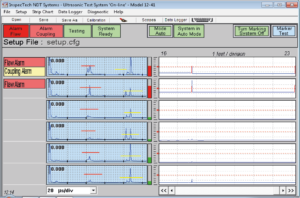
Typical operator screen showing 6 channels
This test unit uses an overhead carriage, which travels above a stationary pipe. This arrangement is the usual method of choice.
An alternative method, involving a stationary test head with the pipe being conveyed underneath is also available.
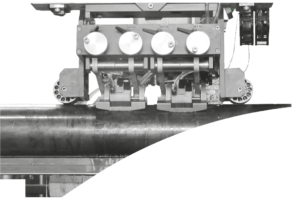
TESTING OF ERW TUBE & PIPE WELDS
Over the years the welded tube industry has come to rely on InspecTech® ultrasonic testing systems to verify weld quality and integrity both on the tube mill and on the finishing floor. Ultrasonic testing of welded tube is a universally recognized method, offering equal sensitivity to both inside and outside defects regardless of material thickness. Codes of practice such as ISO, API and CSA all cite ultrasonic testing of welds as an acceptable, or even mandatory, method. Depending upon requirement, InspecTech can supply systems with 2, 4, 6 or more transducers to test various material thickness ranges and also to test HAZ (heat affected zones) and monitor material gauge.
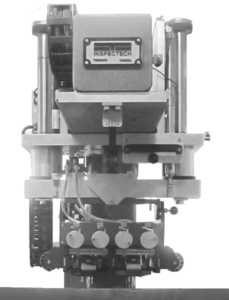
KEY FEATURES
- Advanced transducer technology.
- Multi-probe test heads are easy to set-up and calibrate.
- Ideal for inspecting to API-5L, API-5CT and ISO standards.
- Robust mechanical construction.
- Complete Data Logging of all on-line Test Parameter data is easily stored, retrieved, hard-copied or downloaded.
- Instant recall of previously used setups.
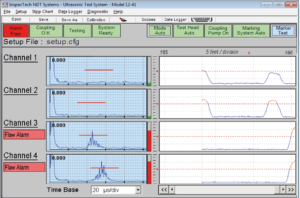
Typical operator's screen for a 4 channel unit.
With many years of experience in NDT systems, InspecTech exercises continuous improvement policies, to supply the welded tube industry with systems of the highest reliability and sophistication, coupled with ease of understanding and operation.
For weld-line testing of carbon steel tubing 50mm (2.0”) diameter and up (and more recently down to much smaller diameters), the method of choice is ultrasonic testing. Ultrasonic testing is very sensitive to defects throughout the weld section and, at the same time, the test is relatively insensitive to process variations.
INCLUDED ACCESSORIES
- Distance odometer and defect marking system.
- Coupling liquid setting tank and delivery sustem.
- Audio/visual alarms
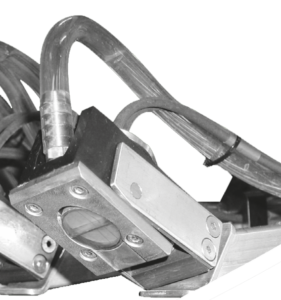
The InspecTech® Ultrasonic monitor for pipe skelp or strip material is a multi-channel unit that measures and records material gauge as well as checking for laminations and segregations in the material. The monitor is used in pipe and tube manufacture as well as in plate and strip mills.
KEY FEATURES
- Coverage from 10% to 100% of material surface.
- Unused transducers can be “parked” to suit different strip widths.
- Alarm function can be tailored to defect size or area.
- Outer transducers can be set up to follow strip edges.
- Complete Data Logging of all on-line Test Parameters easily stored, retrieved, hard-copied or downloaded.
- Instant recall of previously used setups.
To accommodate different widths of strip or skelp, transducer arms can be positioned individually on a crossbar that straddles the line. Unused transducers are simply lifted into a “park” position, and they become inoperative when parked.
Undulations and twists in the tested material are compensated by the individual transducer holders, which include both pivot and swivel actions. In addition, bouncing of the transducer arms is minimized by a pneumatic system that applies constant downward force to the test heads.
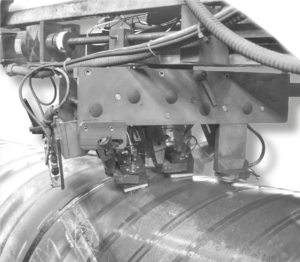
Ultrasonic testing of DSAW/SAW welded spiral pipe is a well-established and widely used technique, which is used to meet API and other codes of practice. InspecTech offers comprehensive systems for Spiral Weld testing, including an automated, laser guided weld tracking subsystem. InspecTech has developed and refined a probe system that utilizes immersion transducers in a special transducer holder. This system creates shear waves at the pipe interface. With multi-channel processing technology, InspecTech’s multi transducer probe assemblies are easy to set-up and calibrate.
KEY FEATURES
- Multi probe test heads are easy to set-up and calibrate.
- Tandem probes offered to ensure full cross-section testing.
- Flexible scope of supply with a wide variety of options.
- Complete data logging provides accurate records of all test parameters and test results.
- Robust mechanical construction.
- Complete Data Logging of all on-line Test Parameters easily stored, retrieved, hard-copied or downloaded.
- Instant recall of previously used setups.
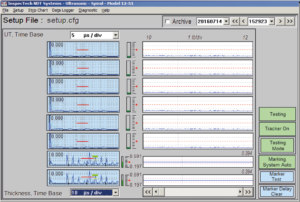
Typical operator screen showing 8 channels.
Our laser guided tracking system is used for spiral tube weld testing the tracking system is very reliable and simple to set-up. Operator needs to position the test head in desired location on the weld and engage the tracking system. From this moment on the test head will automatically follow the weld, even with significant weld line shift over time. The configuration of the system and scope of supply can be individually adjusted. Based on mill structure and testing requirements the best and most cost effective option will be offered by InspecTech to meet our customers' needs.

